How to Clean Small Kitchen Appliances
[ad_1]

This article provides excellent suggestions and guidelines for cleaning these small kitchen appliances, including blenders, coffeemakers, electric can openers, garbage disposals, toasters, and waffle irons. You’ll learn how to get rid of stuck-on food, eliminate odors, and more.
In the next section, we’ll start by talking about a small appliance that can get particularly messy: the blender.
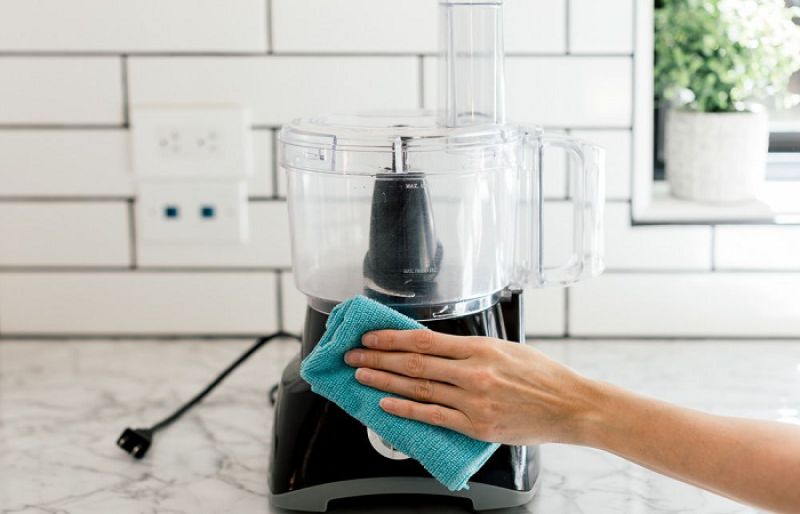
Most blender jars can be washed in your dishwasher; some cannot. Some blades are dulled by repeated exposure to the dishwasher detergents; some are not. Always read and follow the manufacturer’s cleaning instructions. If you wipe the base of a blender after each use, you will rarely have to scrub it.
To clean the blender jar, fill it with a warm detergent solution and run the blender at high speed for about 15 seconds. Rinse well and dry.
To retain the sharpness of the blades, do not wash the blender’s assembly in the dishwasher.
Glass cleaner is excellent for cleaning stainless-steel blender bases and trim. Simply spray it on and buff with a soft cloth.
An all-purpose cleaner or a solution of baking soda and water cleans plastic blender bases.
Time for a warm-up. Read the next section to find out how to clean coffeemakers.
Cleaning Coffeemakers
Drip coffeemakers are easy to clean — all you have to do is change the filter; wash the pot, lid, and basket in a detergent solution; and quickly wipe the base with a cloth. Percolators, on the other hand, need a thorough, occasional cleaning to get rid of oil buildup that can affect the taste of the coffee.
Remove coffee and mineral stains from the glass pot of an automatic drip coffeemaker by adding 1 cup crushed ice, 1 tablespoon water, and 4 teaspoons salt to carafe when it is at room temperature. Gently swirl mixture, rinse, and then wash as usual.
Allow a heated percolator to cool before cleaning.
Clean the spout and tubes of a percolator with a special percolator brush and sudsy warm water.
Use a synthetic scouring pad — never harsh abrasives or steel wool — to remove stubborn soil from percolator parts. If the surface becomes scratched, oil and other coffee residues will accumulate in the scratches.
In the next section, we’re going to open things up and learn how to clean electric can openers.
Cleaning Electric Can Openers
An electric can opener is a great small appliance for the kitchen because it allows you to open cans with minimal effort. Better yet, an electric can opener requires only light care. Nevertheless, that light care needs to come on a regular basis.
Here are the handful of steps you need to take to keep your electric can opener in working condition:
Always remember to unplug a can opener before cleaning it; do not immerse the case in water.
Wipe the can opener after each use to remove food spills or drips. Use a sponge dampened in a warm soapy solution made from liquid dishwashing detergent.
Periodically remove the cutting wheel and lid holder and soak them in hot sudsy water.
Scrub caked-on food with a toothbrush; rinse, dry, and replace the parts.
Dispose of your bad cleaning habits by reading the next section on cleaning garbage disposers.
Cleaning Garbage Disposals
Garbage disposals are self-cleaning, but they can get smelly, especially if you let food sit in them for any length of time. To keep your garbage disposal odorless and running smoothly, operate it with a full stream of running cold water. Flush the garbage disposal for a few seconds after turning it off to ensure that all debris is washed away.
Keep the following materials out of the garbage disposal: metal, wood, glass, paper, or plastic objects; fibrous organic waste, such as artichoke leaves and corn husks; and caustic drain cleaners.
If an unpleasant odor begins to come from your garbage disposal, eliminate it by tearing up the peels of citrus fruit and putting them into the disposer. Grind them with a stream of cold running water, and enjoy the fresh smell. Or sprinkle baking soda over ice cubes and grind them in the disposal.
Cleaning Toasters
Toasters are crumb catchers and smudge collectors. They need regular attention to keep them clean, shiny, and crumb-free. Here’s what you should do:
Remember to unplug the toaster and let it cool before cleaning it. Never immerse the toaster in water.
Wipe the exterior of the toaster regularly. Remove the crumb tray at the base of the toaster and shake out accumulated crumbs; wash the tray in warm soapy water.
If your toaster does not have a crumb tray, turn the toaster upside down and shake it over the sink or a large garbage can.
Use a thin soft brush to remove crumbs from the interior.
Metal utensils should not be used to clean the inside of the toaster.
In the final section of this article, we’ll find out what it takes to clean a waffle iron.
Cleaning your toaster oven after you use it prevents a squalid buildup of food spatters and crumbs.
Wipe the exterior of the oven and the crumb tray regularly; wipe the interior of the oven with a warm dishwashing solution after cooking greasy foods. A synthetic scouring pad will remove stubborn soil from the tray and racks. The plastic parts are best cleaned with a warm detergent solution.
Clean a toaster oven only when it is cool and has been disconnected.
Never immerse the oven in water, and don’t use harsh abrasives, steel wool, or a commercial oven cleaner to clean a toaster oven.
Cleaning Waffle Irons
Waffle irons need little care. The grids are made from seasoned cast iron or a nonstick surface and generally do not require washing after ordinary use. There are, however, some important things to remember, such as:
Never clean a waffle iron until it is cool and has been unplugged. Do not immerse a waffle iron in water.
Wipe the exterior of your waffle iron and clean up batter spills after each use.
Wipe the grids with a paper towel that has been dampened with vegetable oil. Wipe the grids of your waffle iron with vegetable oil.
If waffles stick to the grids and burn, remove the grids and wash them in warm soapy water.
The cleaning guidelines outlined in this article will help keep your small kitchen appliances looking like new. Even better, they should work better, too.
[ad_2]